With the latest version Db2 (version 10.X) the native SQL client db2cc has been removed so you now need a separate SQL client for your admin work, this is a real ball ache, but something that us developers have been putting up with for ages, so I thought I would do a quick guide to install a nice SQL client for connections.
My recommendation for this is http://squirrel-sql.sourceforge.net/
why?
- Been around for ages so well respected (even die hardened DBAs will acknowledge that your choice is not terrible)
- FREE
- Small footprint (just needs Java and you will already have that if you are doing connections dev/admin)
- hellishly powerful
- Uses IBM’s own jar files.
- works on Win / Mac / Linux
There are tons of other options of course most, developers will be familiar with Eclipse SQL as that is the most common plug in for eclipse, where as some admins prefer Toad or IBM Data Studio
Once you have downloaded and run the install Jar you will only find one option worth mentioning, and that is to install the IBM DB2 option (just a tick box)
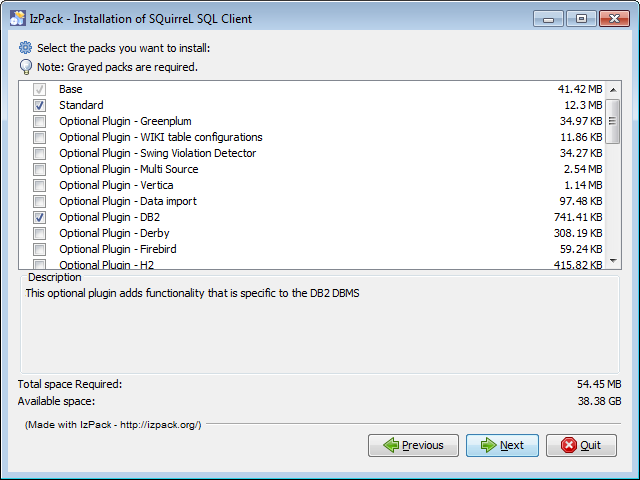
Everything else is just either next or picking the install directory
When you first open it you will get a screen like this

Click on the big “Drivers” button on the left hand side, and scroll down till you see “IBM DB2 App Driver” entry, you will see that like nearly all the other entries, it has a red X by it,

Now Double Click on the entry and in the pop up box, move to the “Extra Class Path” Tab

Next click on the “Add” button and go hunting for the driver Jar files, these are best to get of the DB2 server, they are:
db2jcc.jar
db2jcc_licence_cu.jar
and you will tend to find them in the directory
X:Program FilesIBMSQLLIBjava
where ever you have installed the db2 server
Once you have added them, change the “Class Name” drop down to
com.ibm.db2.jcc.DB2Driver

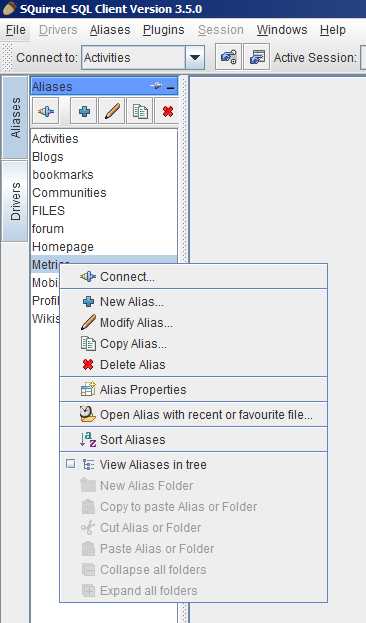
That’s you driver sorted, now make some connections
Click on the “Aliases” button then the “+” button to add a new Aliases

Select the driver you just setup, from the drop down field
Then in the URL field put the connection string for the database you want to get to in the format
jdbc:db2://XXX.XXX.XXX.XXX:50000/XXXX (port 50000 is the default port for db2)
for example
jdbc:db2://localdb2.ldc.com:50000/BLOGS
will get me the blogs database on my local server
for extra info here is the list of all the databases for the different connections Apps
Connections App: Files, DataBase: FILES
Connections App: Activities, DataBase: OPNACT
Connections App: Blogs, DataBase: BLOGS
Connections App: Communities, DataBase: SNCOMM
Connections App: Community Events, DataBase: SNCOMM
Connections App: BookMarks, DataBase: DOGEAR
Connections App: Forums, DataBase: FORUM
Connections App: HomePage , News, Search, DataBase: HOMEPAGE
Connections App: Metrics, DataBase: METRICS
Connections App: Mobile, DataBase: MOBILE
Connections App: Profiles, DataBase: PEOPLEDB
Connections App: Wiki, DataBase: WIKIS
Then just use enter the username and password (hint, you will NEVER get the lsuser account off your admin)
and click “OK”

You now have an alias that you can double click to connect to the specified database, you are going to have to create one for each of the Connections databases 🙁 , but you can make things easier by right clicking on a alias and copying it so you only have to make changes rather than start again.
But it does seem a a pain to make everybody do this full setup, you can cheat even more by copying the SQLAliases23.xml file (it’s normally in a hidden directory in the users home drive but varies according to the operating system) and using it to replace the one on your target PC, all the aliases will then appear already setup.
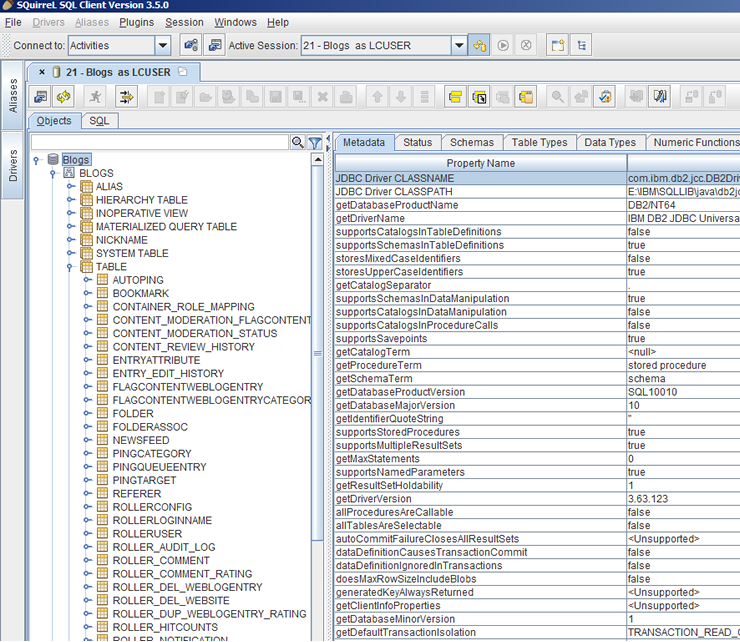
Finally before this turns into a Squirrel sql manual, you can double click each of the aliases and not only see the database tree and gain access to the tables, but run SQL queries via the SQL tab at the top of the screen just under the normal menus.
Have Fun!!
NOTE: I’m not a proper Connections / Web Sphere admin, If you want proper Web Sphere and Connections admin you want the Turtle Partnership